


#软件简介
Xind是一款全球领先的“可视化思考”工具,为企业打造全新的可视化办公平台,协助用户快速捕捉创意与灵感。通过直观、友好的图形化操作界面,将思想、策略及商务信息转化为行动蓝图,全面提升企业办公效能。
Xind不仅可以绘制思维导图,还能绘制鱼骨图、二维图、树形图、逻辑图、组织结构图。并且,可以方便地从这些展示形式之间进行转换。可以导入MindManager、FreeMind数据文件。灵活地定制节点外观、插入图标、丰富的样式和主题。输出格式有:HTML、图片。

#基本操作
打开XMind软件,选择自己喜欢的结构图

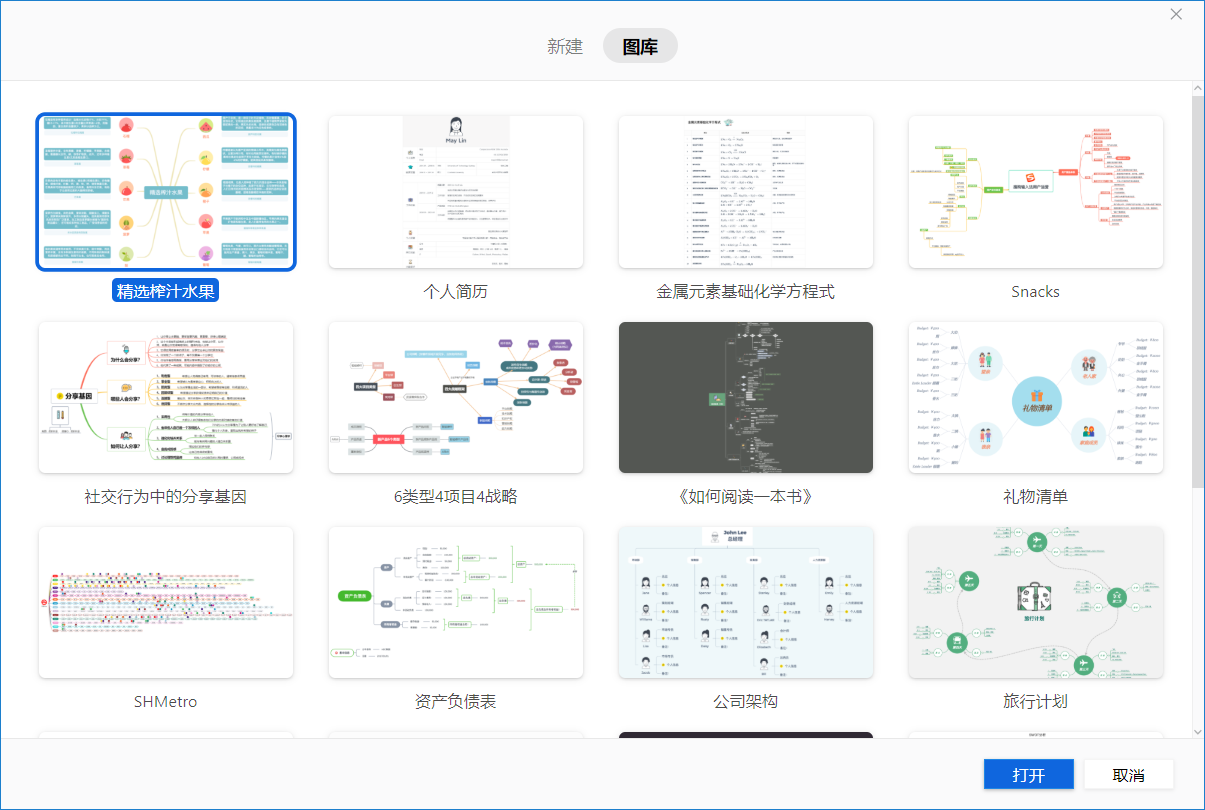
也可以点击图库,根据需要选择合适的模板
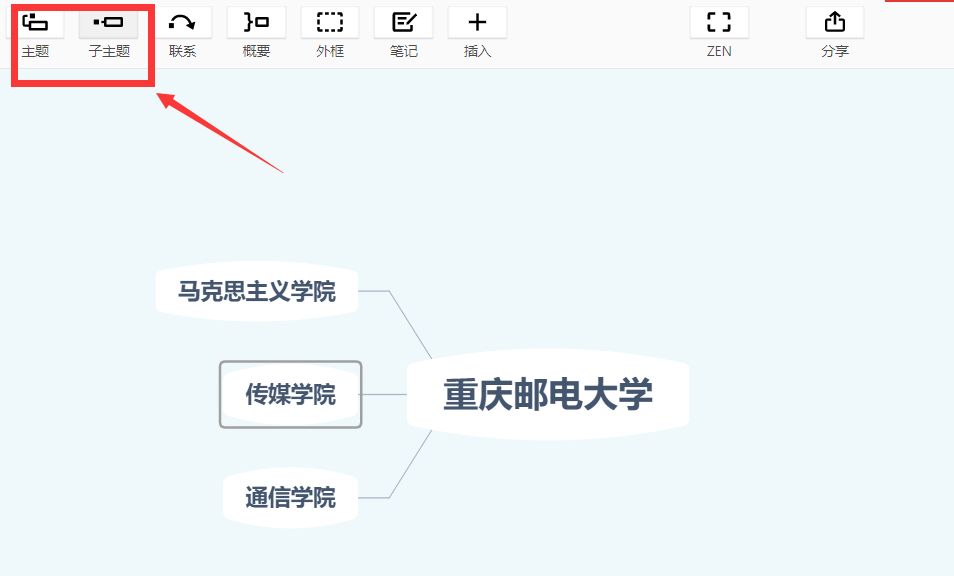
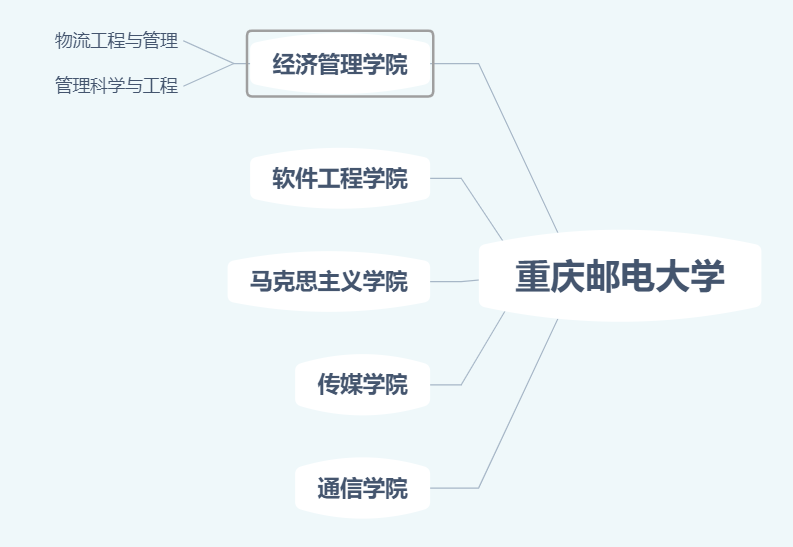
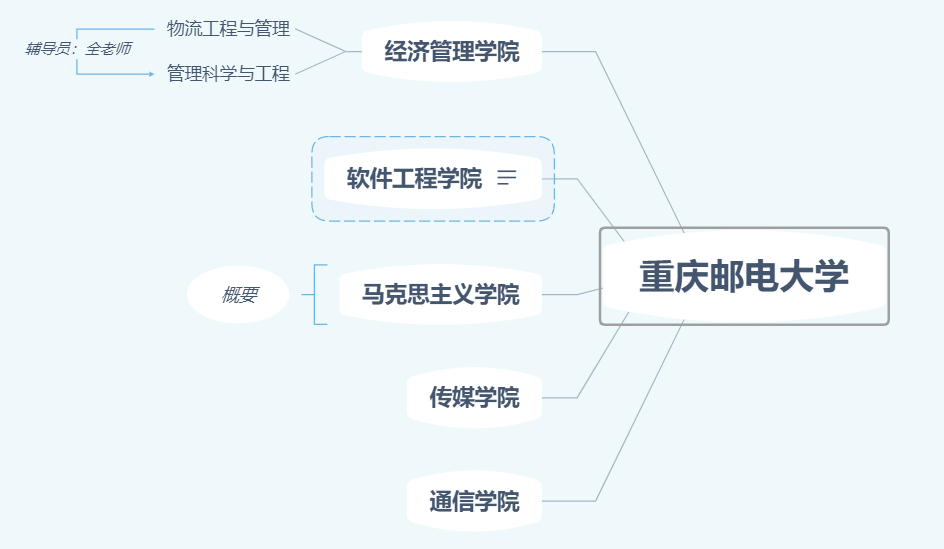
点击“主题”添加多个同级主题,点击“子主题”可连续添加多个子主题,层级逐渐增加。
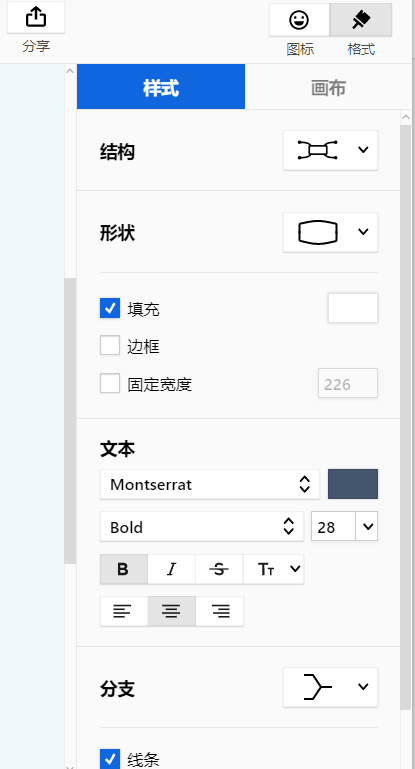
编辑页面右边,点击“格式”,可对对应窗口的结构、形状、文本等属性进行修改
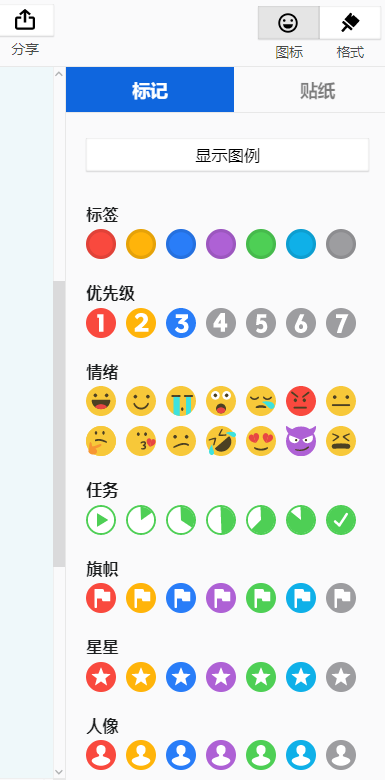
点击“图标”,可添加标签、优先级等贴纸
双击指定窗口,即可对内容进行编辑
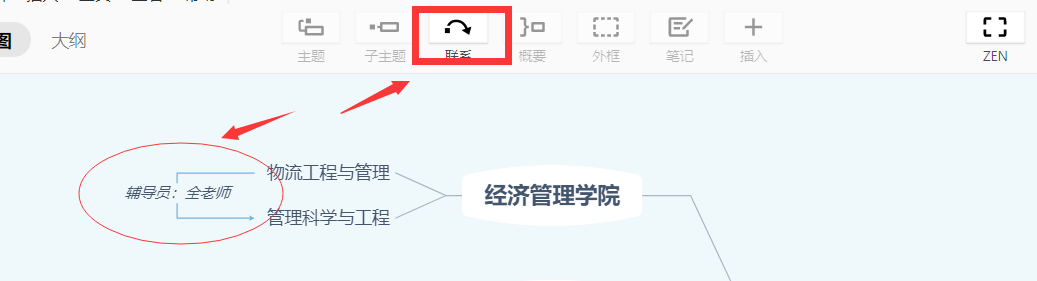
选中指定窗口,再点击“联系”,可与其他窗口建立关系网,线条上可以添加描述。
选择指定窗口,点击“概要”可对窗口进行简单标注,适合做读书笔记总结。

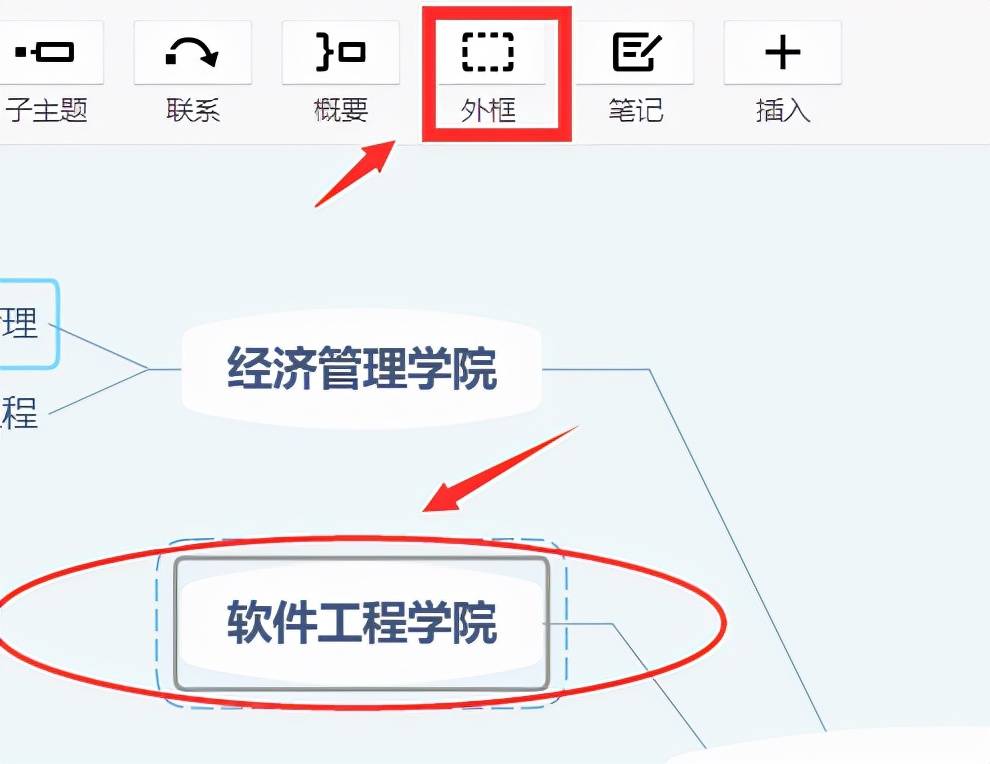
选择指定窗口,点击“外框”,可对窗口进行突出显示。
选中指定窗口,点击“笔记”,可对窗口添加批注。

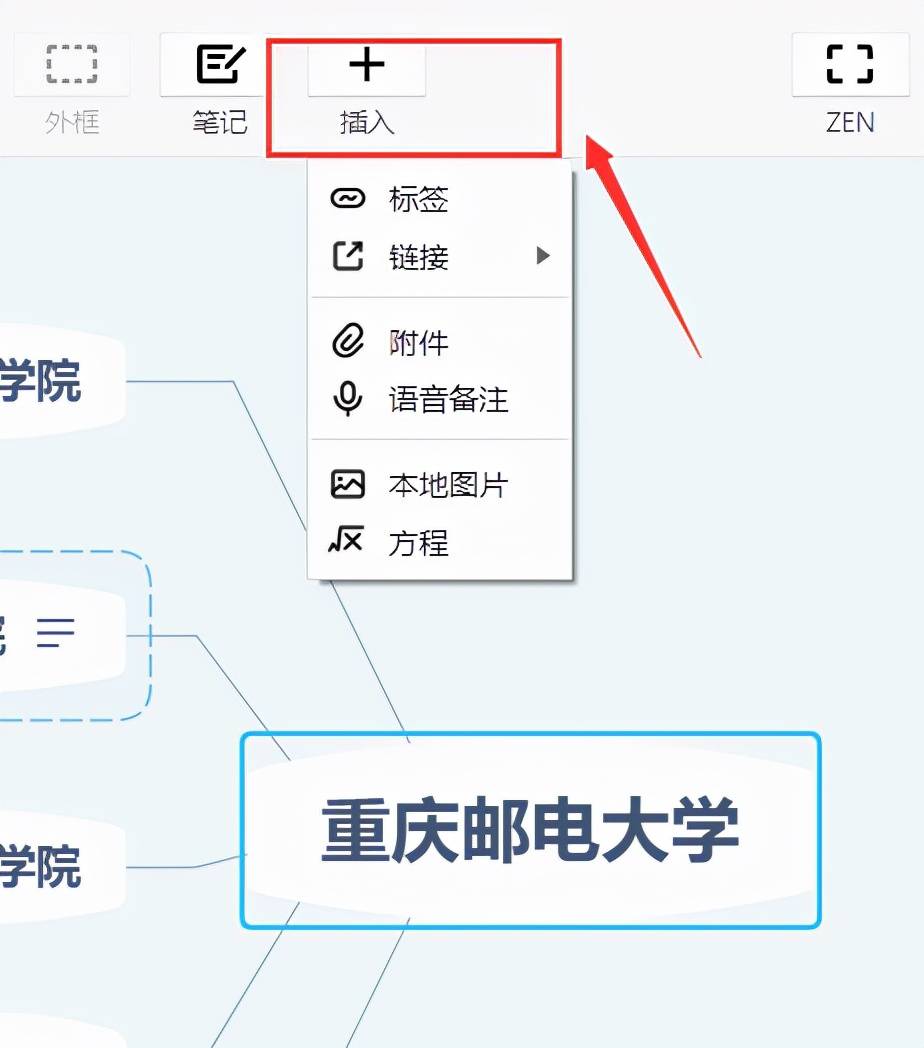
选中指定窗口,点击“插入”,可添加标签、链接、附件等
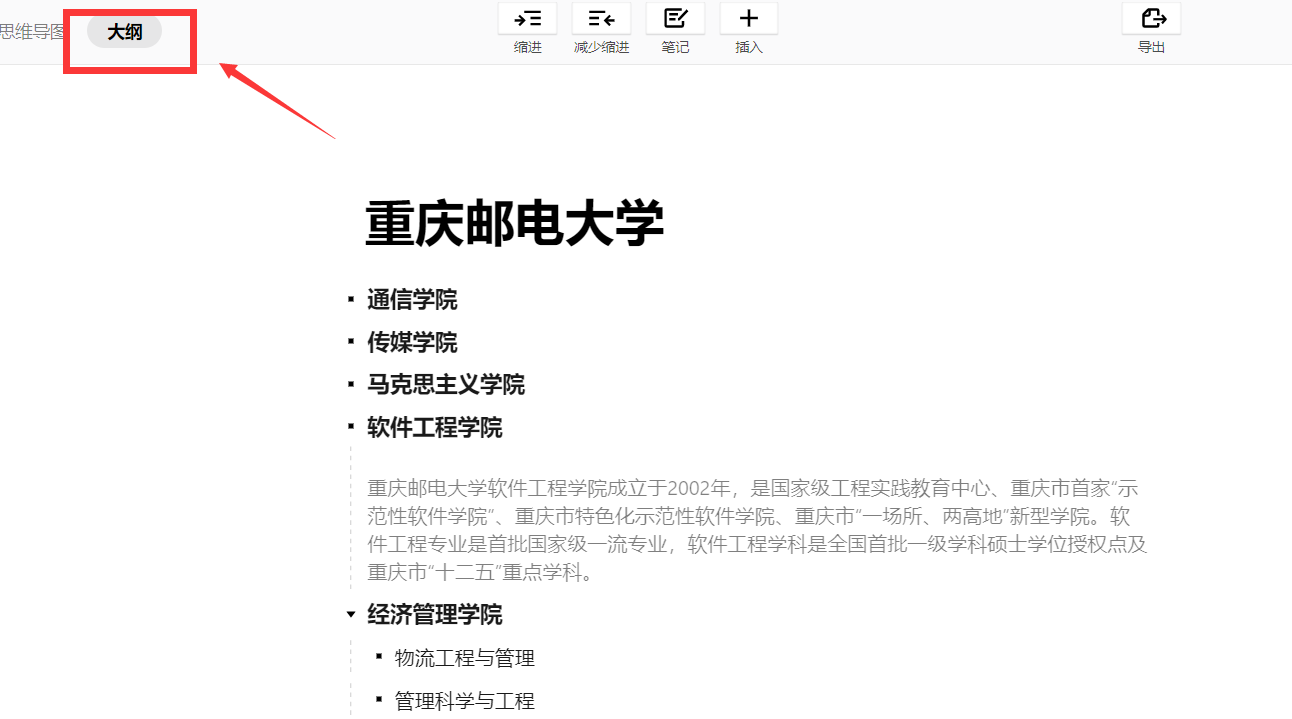
除了在思维导图页面直接对窗口进行修改调整外,还可以通过“大纲”编辑内容,可直接转为思维导图。
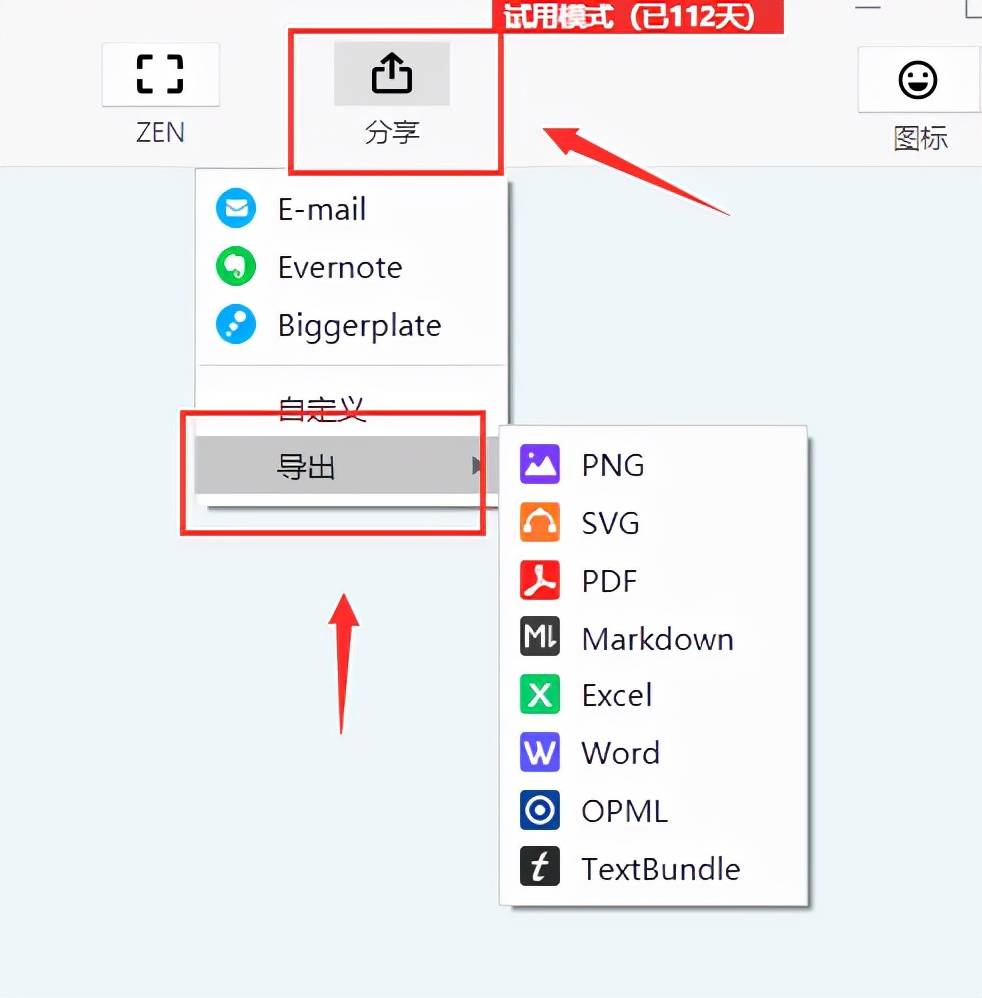
思维导图制作完成后,点击“分享”、“导出”按钮,可选择导出保存方式。

#新手必备快捷键
(1)选中一个模块以后,按一下键盘上的Tab,就能产生这个模块的下一级(子主题)。
(2)按一下Enter,在该模块下方产生它的并列主题。
(3)同时按Shift+Enter,在该模块上方产生它的并列主题。
(4)同时按Alt+Enter,在该模块上方产生它的注释。
(5)选中连续的几个模块,或者选择在这些模块前一级的一个模块之后,同时按Ctrl+],在这些模块的后方会出现一个大括号,表示这些内容归属一类,后面可以写概要。
(6)选中连续的几个模块,或者选择在这些模块前一级的一个模块之后,同时按Ctrl+B,会把这些模块框到同一个方框里。
(7)同时按Ctrl+L,会出现一根有箭头的连接线,是从这个模块出发的。如果你点一下已经有的模块,就会在这两个模块之间建立联系;如果你点的是空白处,就会指向一个自由主题。
(8)双击任意空白处,会在该处生成一个自由主题。

#英文学习
Software introduction
Xind is one of the world's leading "visual thinking" tools, for enterprises to create a new visual office platform, to help users quickly capture ideas and inspiration. Through the intuitive and friendly graphical operation interface, ideas, strategies and business information can be transformed into action blueprints to comprehensively improve corporate office efficiency.
Xind can draw not only mind maps, but also fishbone, two-dimensional, tree, logic, and organizational charts. And you can easily switch from one presentation to another. You can import MindManager and FreeMind data files. Flexible customization of node appearance, insertion ICONS, rich styles, and themes. Output format: HTML, image.
Basic operation:
Open XMind software and choose your favorite structure diagram
You can also click on the gallery and select the appropriate template as required
Click "Theme" to add multiple topics of the same level, click "sub-theme" to add multiple sub-topics consecutively, gradually increasing the level.
Edit the right side of the page and click "Format" to modify the structure, shape, text and other properties of the corresponding window
Click icon to add labels, priorities and other stickers
Double-click the window to edit the content
Select the specified window, and then click "Contact", you can establish a network with other Windows, you can add a description on the line.
Select the specified window and click "Summary" to simply mark the window, which is suitable for summary of reading notes.
Select the specified window and click "Outer Box" to highlight the window.
Select the specified window and click Notes to add comments to the window.
Select the specified window and click "Insert" to add labels, links, attachments, etc.
In addition to modifying and adjusting the window directly on the mind map page, you can also edit the content through the "outline" to directly convert the mind map.
After the mind map is made, click "Share" and "Export" buttons to select the export and save mode.
Essential shortcut keys for beginners
(1) After selecting a module, press Tab on the keyboard to generate the next level (subtheme) of the module.
(2) Press Enter to generate its parallel theme below the module.
(3) Simultaneously press Shift+Enter to create its parallel theme above the module.
(4) Simultaneously press Alt+Enter to generate its comment above the module.
(5) Select several consecutive modules, or select a module in the previous level of these modules, and press Ctrl+] at the same time, a curly bracket will appear behind these modules, indicating that the content belongs to a class, and the summary can be written behind.
(6) Select several consecutive modules, or select a module in the previous level of these modules, press Ctrl+B at the same time, will box these modules into the same box.
(7) Press Ctrl+L at the same time, a connecting line with an arrow will appear, starting from this module. If you click on an existing module, you create a connection between the two modules. If you click on the margin, it will point to a free topic.
(8) Double-click any blank, a free theme will be generated there.
